Docker安装Oracle11G
1. 准备镜像
1.1 拉取镜像
docker pull registry.cn-hangzhou.aliyuncs.com/helowin/oracle_11g1.2 查看是否拉取成功
[root@localhost project]# docker images
REPOSITORY                                             TAG       IMAGE ID       CREATED         SIZE
registry.cn-hangzhou.aliyuncs.com/helowin/oracle_11g   latest    3fa112fd3642   7 years ago     6.85GB
1.3 重命名
docker tag registry.cn-hangzhou.aliyuncs.com/helowin/oracle_11g:latest oracle11g:1.0
上图中标记的两个镜像中,镜像ID一样,名称跟TAG不一样,说明是重命名的,至此,镜像准备完成。
2. 从临时容器中复制文件到宿主机
2.1 在宿主机创建挂载文件的文件夹
mkdir -p [要放置Oracle示例的目录]
eg:
mkdir -p /opt/demo/tam/database
2.2 修改目录的权限
chown -R 500:500 /opt/demo/tam/database2.3 创建临时容器
docker run --name itmahy_oracle_temp \
-p 15221:1521 \
--privileged=true \
-d \
oracle11g:1.0
2.4 复制临时容器中的文件到宿主机
docker cp [容器ID/名称]:[容器中文件的目录] [宿主机中刚刚创建的目录]
docker cp itmahy_oracle_temp:/home/oracle/app/oracle/oradata/ /opt/demo/tam/database/
使用 docker cp命令时,会将容器的目录最后一级拷贝下来(/home/oracle/app/oracle/oradata/中的oradata目录),所以到宿主机中这个目录是:/opt/demo/tam/database/oradata,这个目录的下面是oracle实例的目录。

所以在 docker run时,-v参数的值为 /opt/demo/tam/database/oradata而不是我们创建的/opt/demo/tam/database,自己试一遍就明白了。
2.5 删除临时容器
docker rm -f itmahy_oracle_temp
3. 正式容器
3.1 创建正式容器
docker run -d \
--name itmahy-oracle \
-p 1522:1521 \
-v /opt/demo/tam/database/oradata/:/home/oracle/app/oracle/oradata \
--privileged=true \
oracle11g:1.0
启动成功。
3.2 复制文件
这一步很重要,上面 2. 从临时容器中复制文件到宿主机 就是为这一步做准备的。
进去容器
docker exec -it itmahy-oracle bash删除
control02.ctl文件
rm -rf /home/oracle/app/oracle/flash_recovery_area/helowin/control02.ctl恢复
control02.ctl文件
cp /home/oracle/app/oracle/oradata/helowin/control01.ctl /home/oracle/app/oracle/flash_recovery_area/helowin/control02.ctl退出
exit重启容器
docker restart itmahy-oracle实操:
[root@localhost oradata]# docker exec -it itmahy-oracle bash
[oracle@771247f49d52 /]$ rm -rf /home/oracle/app/oracle/flash_recovery_area/helowin/control02.ctl
[oracle@771247f49d52 /]$ cp /home/oracle/app/oracle/oradata/helowin/control01.ctl /home/oracle/app/oracle/flash_recovery_area/helowin/control02.ctl
cp: cannot stat `/home/oracle/app/oracle/oradata/helowin/control01.ctl': Permission denied
# 由于没有执行2.2这一步,复制的时候报权限错误
[oracle@771247f49d52 /]$ exit
exit
# 执行 2.2
[root@localhost oradata]# chown -R 500:500 /opt/demo/tam/database
[root@localhost oradata]# docker exec -it itmahy-oracle bash
[oracle@771247f49d52 /]$ cp /home/oracle/app/oracle/oradata/helowin/control01.ctl /home/oracle/app/oracle/flash_recovery_area/helowin/control02.ctl
[oracle@771247f49d52 /]$ exit
exit
[root@localhost oradata]# docker restart itmahy-oracle
itmahy-oracle
[root@localhost oradata]#
图中马赛克是输错的,不用管。
3.3 修改数据库修sys,system密码
进入容器
docker exec -it itmahy-oracle bash切换用户,root用户的密码是
helowin,再切回 oracle 用户
[oracle@771247f49d52 /]$ su - root
Password:
[root@771247f49d52 ~]# su - oracle
登录数据库
sqlplus / as sysdba修改 system 用户密码为system
alter user system identified by system;修改 sys 用户密码为 system
alter user sys identified by system;修改密码规则策略为密码永不过期
ALTER PROFILE DEFAULT LIMIT PASSWORD_LIFE_TIME UNLIMITED;修改数据库最大连接数据
alter system set processes=1000 scope=spfile;关闭数据库
shutdown immediate;启动数据库
startup;实操
[root@localhost oradata]# docker exec -it itmahy-oracle bash
[oracle@771247f49d52 /]$ su - root
Password:
[root@771247f49d52 ~]# su - oracle
[oracle@771247f49d52 ~]$ sqlplus / as sysdba

SQL*Plus: Release 11.2.0.1.0 Production on Thu Dec 14 16:05:17 2023

Copyright (c) 1982, 2009, Oracle.  All rights reserved.

Connected to:
Oracle Database 11g Enterprise Edition Release 11.2.0.1.0 - 64bit Production
With the Partitioning, OLAP, Data Mining and Real Application Testing options

SQL> alter user system identified by system;

User altered.

SQL> alter user sys identified by system;

User altered.

SQL> ALTER PROFILE DEFAULT LIMIT PASSWORD_LIFE_TIME UNLIMITED;

Profile altered.

SQL> alter system set processes=1000 scope=spfile;

System altered.

SQL> shutdown immediate;
Database closed.
Database dismounted.
ORACLE instance shut down.
SQL> startup;
ORACLE instance started.

Total System Global Area 1603411968 bytes
Fixed Size                  2213776 bytes
Variable Size             402655344 bytes
Database Buffers         1191182336 bytes
Redo Buffers                7360512 bytes
Database mounted.
Database opened.
SQL>
3.4 创建新的表空间以及用户
登录数据库
sqlplus / as sysdba新建名为
itmahy的表空间
CREATE TABLESPACE [表空间名称] DATAFILE [dbf文件存放地址] SIZE [表空间大小] autoextend on maxsize 30G;
CREATE TABLESPACE itmahy DATAFILE '/home/oracle/app/oracle/oradata/helowin/itmahy.dbf' SIZE 300M autoextend on maxsize 30G;
创建用户并指定表空间为
itmahy,用户名为itmahy, 密码为itmahy
CREATE USER [用户名] IDENTIFIED BY [密码] DEFAULT TABLESPACE [表空间];
CREATE USER itmahy IDENTIFIED BY "itmahy" DEFAULT TABLESPACE itmahy;
给 dba 权限到
itmahy用户,自己测试的,为了方便,给dba权限
GRANT CONNECT,RESOURCE,dba TO itmahy;实操
[oracle@771247f49d52 helowin]$ sqlplus / as sysdba

SQL*Plus: Release 11.2.0.1.0 Production on Thu Dec 14 16:20:06 2023

Copyright (c) 1982, 2009, Oracle.  All rights reserved.

Connected to:
Oracle Database 11g Enterprise Edition Release 11.2.0.1.0 - 64bit Production
With the Partitioning, OLAP, Data Mining and Real Application Testing options

SQL> CREATE TABLESPACE itmahy DATAFILE '/home/oracle/app/oracle/oradata/helowin/itmahy.dbf' SIZE 300M autoextend on maxsize 30G;

Tablespace created.

SQL> CREATE USER itmahy IDENTIFIED BY "itmahy" DEFAULT TABLESPACE itmahy;

User created.

SQL> GRANT CONNECT,RESOURCE,dba TO itmahy;

Grant succeeded.

SQL>
其他操作
#启动监听
lsnrctl start
#停止监听
lsnrctl stop
#查看监听状态
lsnrctl status
# 查询所有用户
select * from all_users;
# 查看一些参数
show parameter [参数名称]
4.使用DataGrip连接测试
4.1 Centos7防火墙操作
systemctl start firewalld
systemctl stop firewalld
systemctl disable firewalld
# 重启防火墙
firewall-cmd --reload
#当前版本
firewall-cmd --version
firewall-cmd --help
# 当前状态
firewall-cmd --state
# 查看当前状态
systemctl status firewalld
#查看指定端口开放情况
firewall-cmd --query-port=80/tcp
# 查看开放的端口
firewall-cmd --permanent --list-ports
# 开放端口
firewall-cmd --permanent --add-port=8080/tcp
firewall-cmd --permanent --add-port=8083-8085/tcp
# 移除开放的端口
firewall-cmd --permanent --remove-port=8083-8085/tcp
开放上面容器映射的 1522端口
firewall-cmd --permanent --add-port=1522/tcp
firewall-cmd --reload
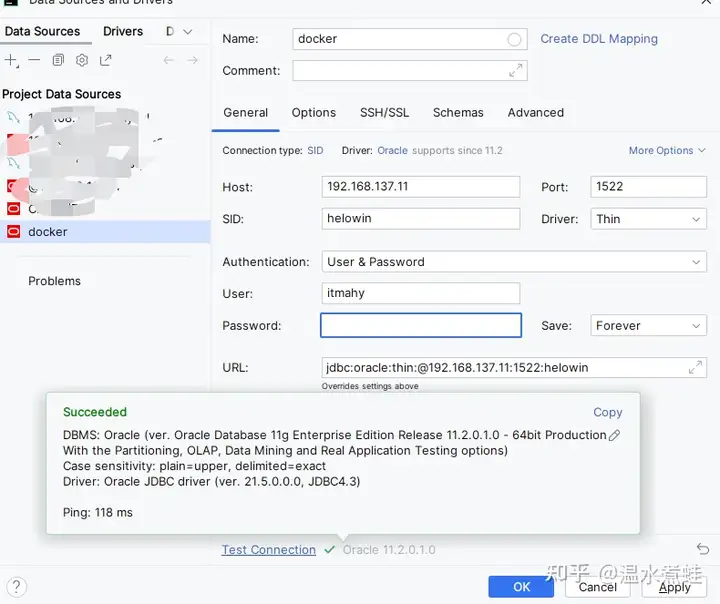
4.2 连接测试

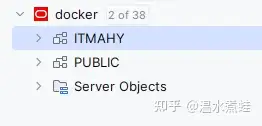
测试连接成功。

至此,Docker安装Oracle数据库成功,但是还有些问题,SID默认为 helowin,没有办法修改以及容器中root跟oracle用户的密码修改出现错误。
